What to do before the module starts
Install a UNIX based operating system
Learning Objectives
If you get stuck on any of the below or above instructions, please post in your class channel on Slack.
⚠️CYF does not support Windows!
We have found that we don’t reliably have volunteers at class who can debug Windows problems, and they frequently come up, stopping trainees from making progress.
We do not support Windows so as to not waste lots of trainee and volunteer time. We have made this decision even though Windows is a popular operating system and has features like WSL which help to get experience with Unix.
If you have a Mac or Linux machine already, you already have a UNIX based operating system. All CYF-supplied laptops run Mac OS or Linux. If you have your own machine and it runs Windows you will need to set up a Linux partition.
If you have still not done this you must do it now. If you need help doing this, post in Slack, or bring your laptop to a CYF co-working space to get support. It’s normal to need help with this process. The Ubuntu website has instructions which you can follow to dual-boot your system.
💡Tip
If you are enrolled as a trainee and you don’t have a suitable computer, Code Your Future can lend you a laptop which runs Mac or Linux. You can find information about borrowing laptops on our signposts site.
Check Git Installation
Learning Objectives
Git
📖Definition: Git
You will use Git continually as a developer. Before we can do any work with it we need to check that you have it installed.
Open your computer’s terminal application and run the command git --version to double check you have Git installed.
If it is installed successfully, you should get a version number (which may not be exactly the same as this example, but should look similar):
git version 2.40.0Otherwise, you will need to install it or ask for support on your Slack channel.
Install VSCode
Learning Objectives
We use VS Code to write all of our code in the course. It is known as an Integrated Development Environment (IDE) and really helps you write great code.
💡Tip
If you are working on a library computer, use the online version of VSCode called Github.dev.
The interface is mostly the same, but you cannot install extensions or use the terminal. You can complete all the tasks in the onboarding module without these features.
Create a work folder
Learning Objectives
📢Important
Make a folder called CYF in your home directory. Store all your work for the course in this folder.
You’ll need to create a CYF folder to store your projects on the course. You can do this any way you like (e.g. through a file explorer, or using the terminal.)
If you want to create the folder using the terminal, expand these instructions.
- Open a terminal on your computer.
For each of the steps below, you’ll need to use the command line in your terminal.
Use this cli documentation to remember terminal commands.
In your terminal, print your current working directory (by running
pwd). Make sure you’re in your home directory. If you’re not, you may need to change directory with the commandcdto your home directory.Make a new directory called
CYFin your home directory (by runningmkdir CYF).Check that the directory got created by listing the children of the directory (by running
ls) - you should seeCYFthere.Change directory into the
CYFdirectory by runningcd CYF.Double check you’re in the right place by printing your current working directory (by running
pwd) again.
💡Tip
If you’re working on a library computer, skip this step. You will store your work in your GitHub account.
Youtube: Fork your Planner
🔗 Set up Planner
Welcome to your coursework planner
This is how you will plan and manage your coursework at CYF. You will add all your work as issues to your fork of this repository, and then use a project board to manage your work. This is broadly how all technical projects are managed, so you will need lots of practice. Get started today.
1. How to get set up
Forking the My-Coursework-Planner repo
- Fork this repo to your own GitHub
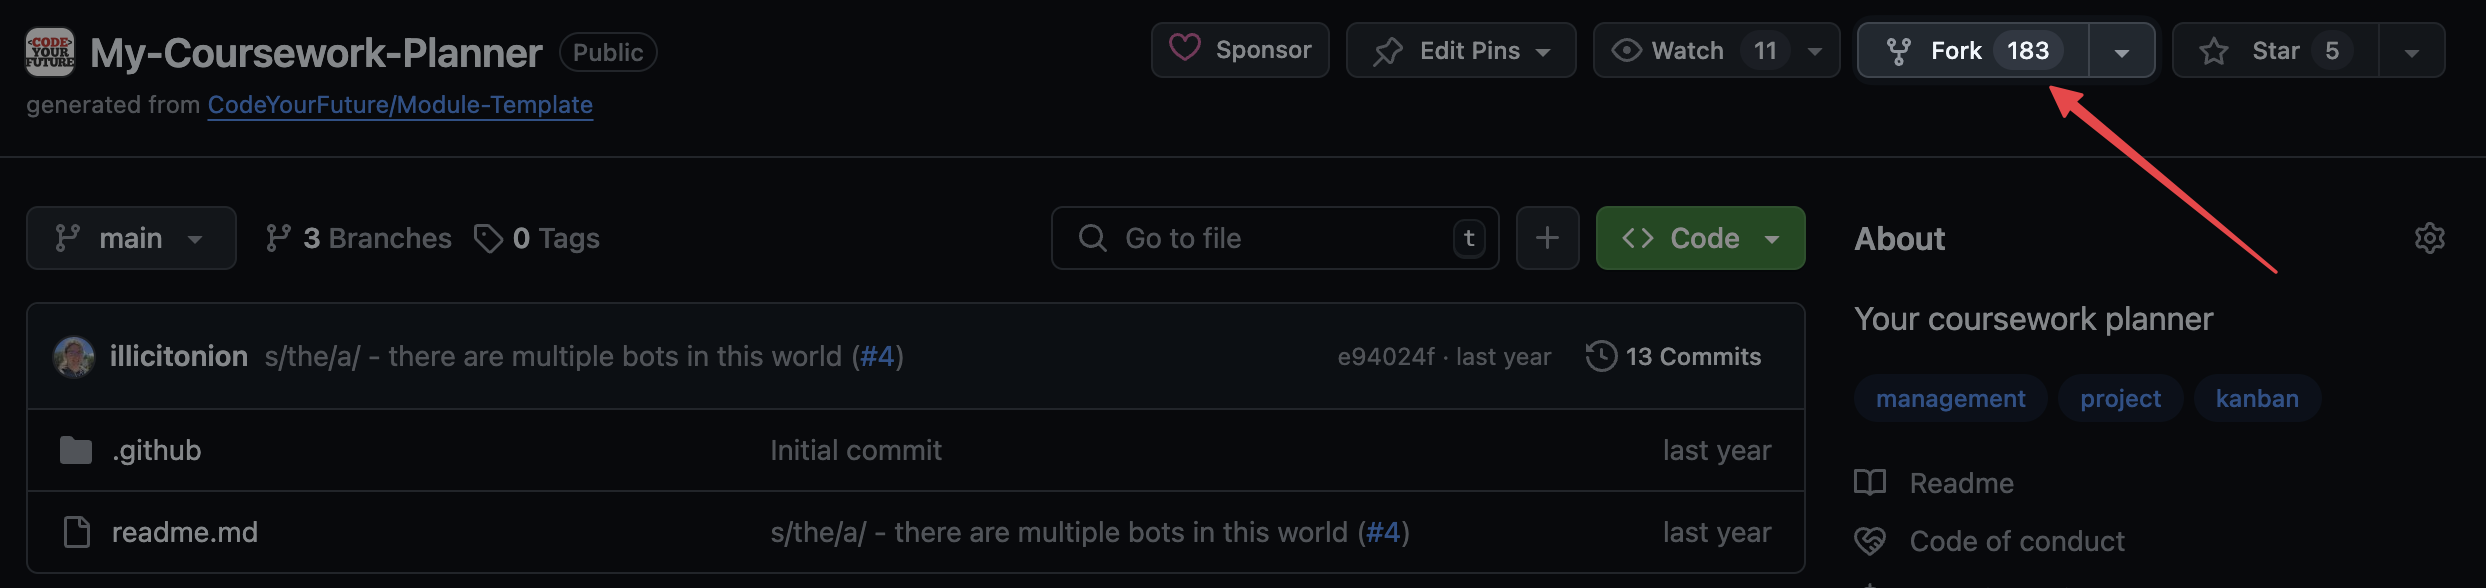
- You should see your own GitHub username under
Owner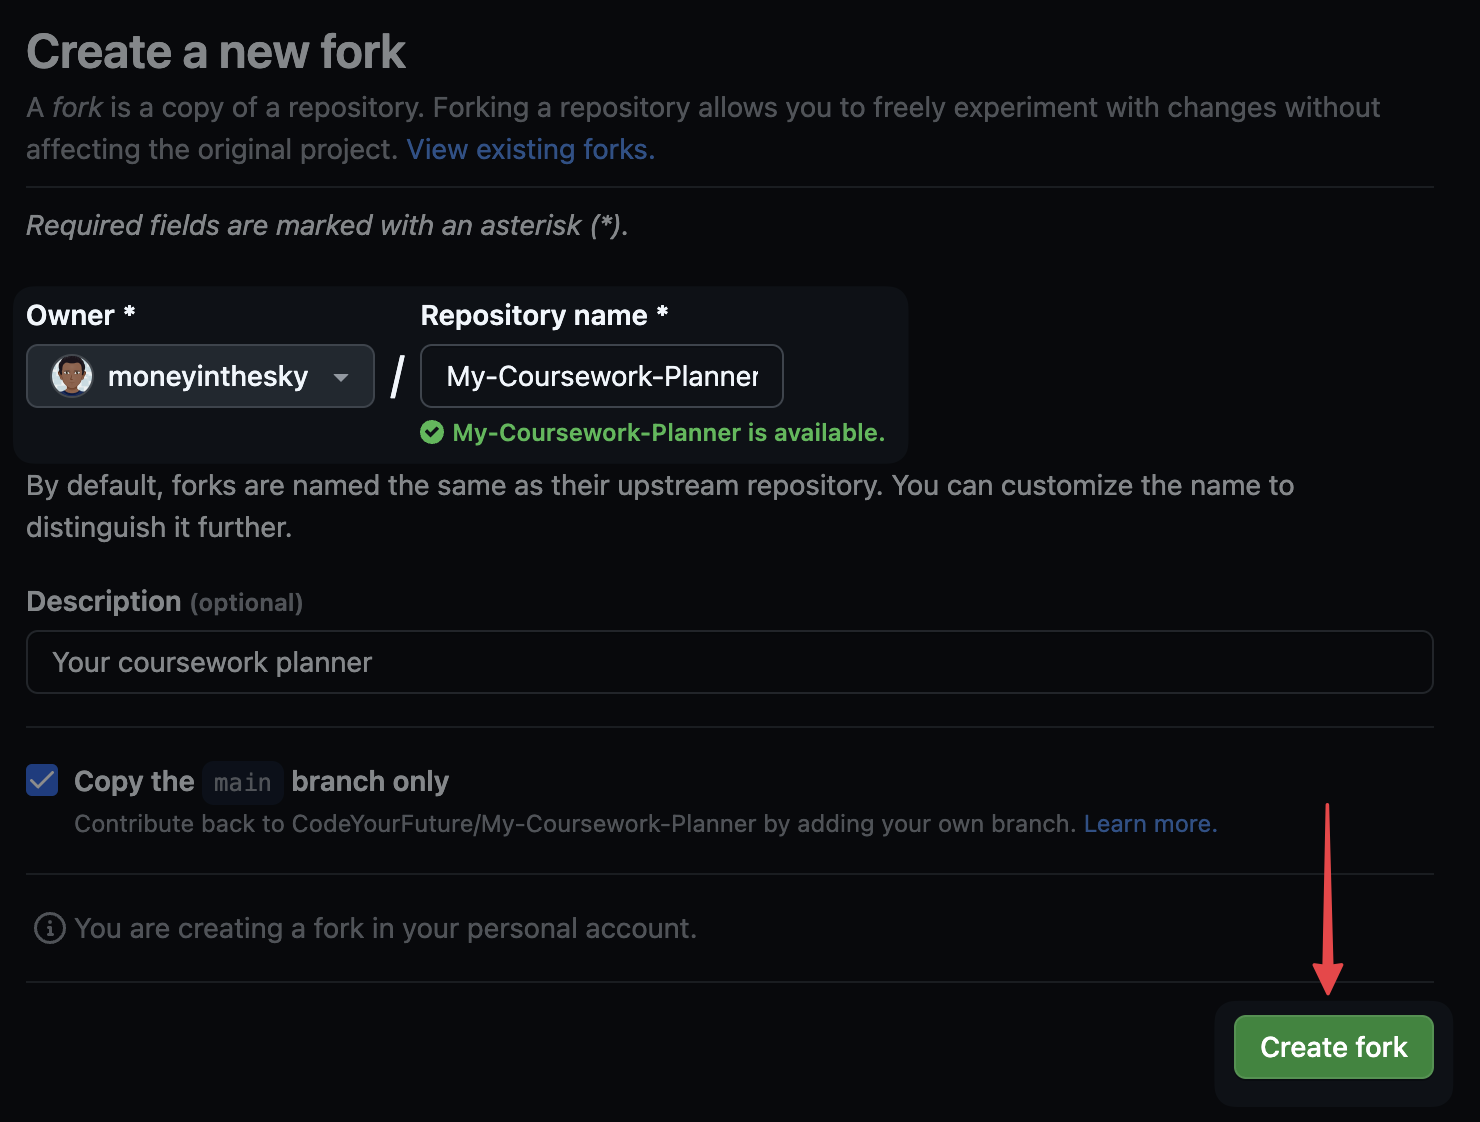
- Turn on
issuesin theSettingsof your forked version of the repo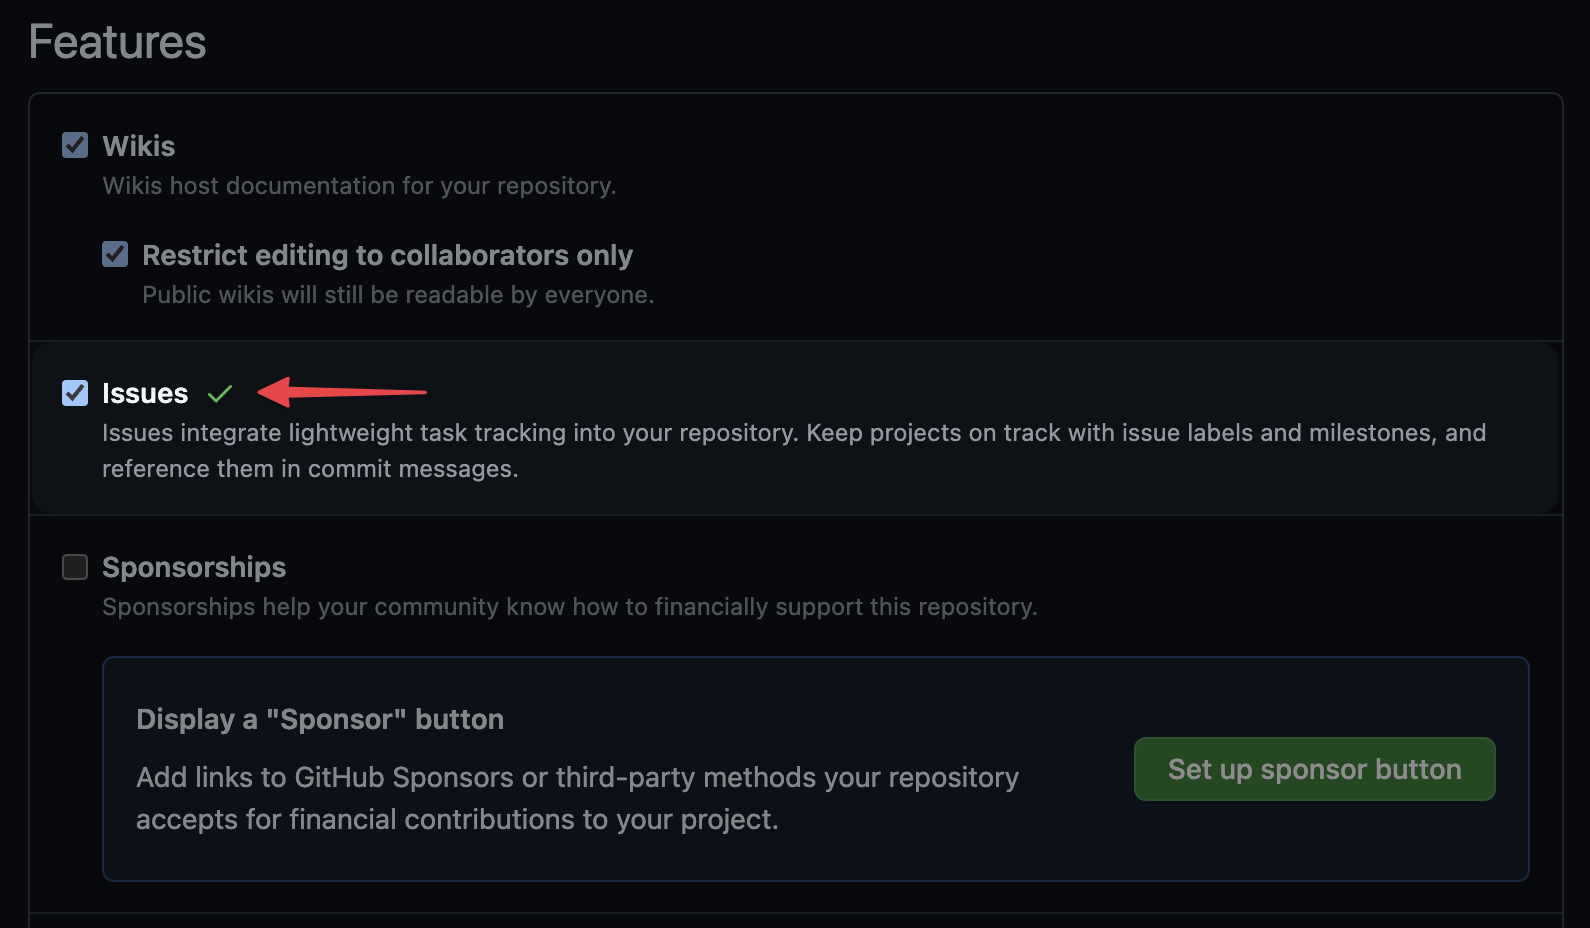
You must fork to your personal Github account. Forks created in the CYF org will be deleted by a bot.
Creating your project board
- Go to the example project board
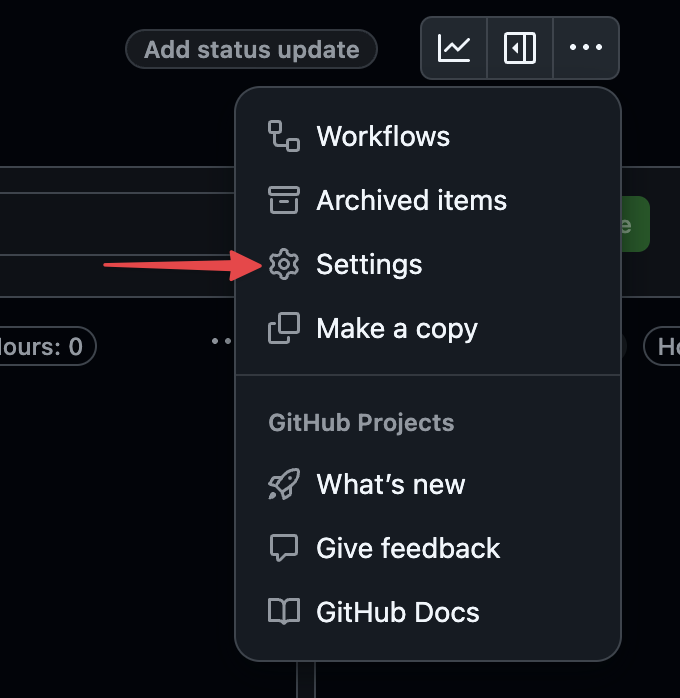
- Click the three-dot menu on the
Coursework Planner Boardthen selectMake a copy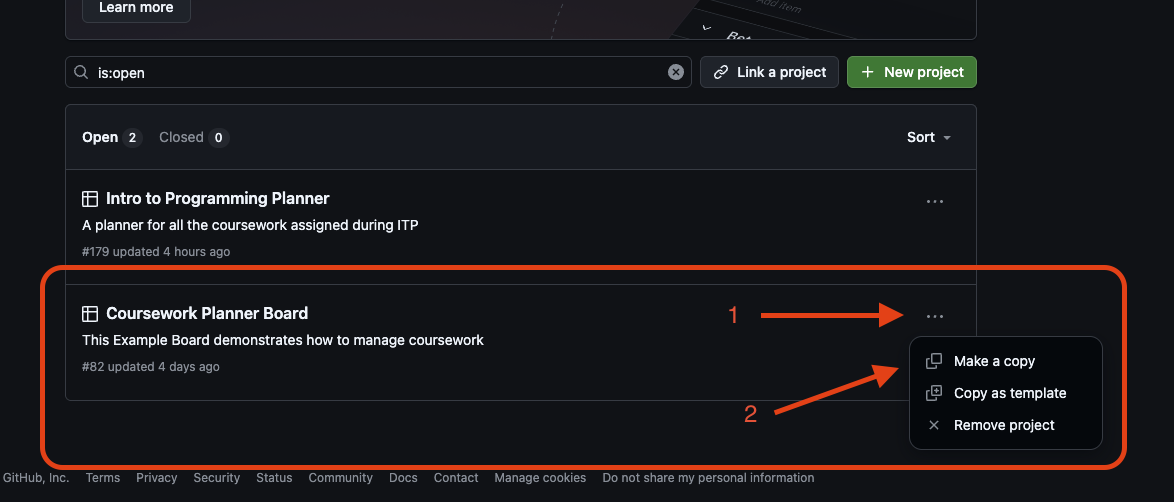
- Make sure your own GitHub username is under
Ownerand change the name to “Coursework Planner”. These steps are very important! If either value is incorrect the issues will not be cloned correctly.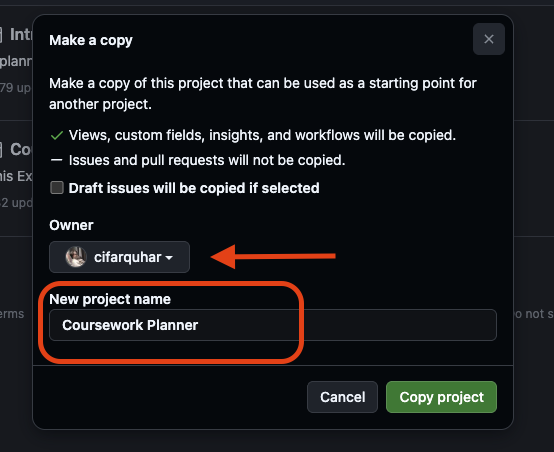
- If you make a mistake naming your project you can go back and change it later. Hover your cursor over the board’s name then click the pen icon which appears.
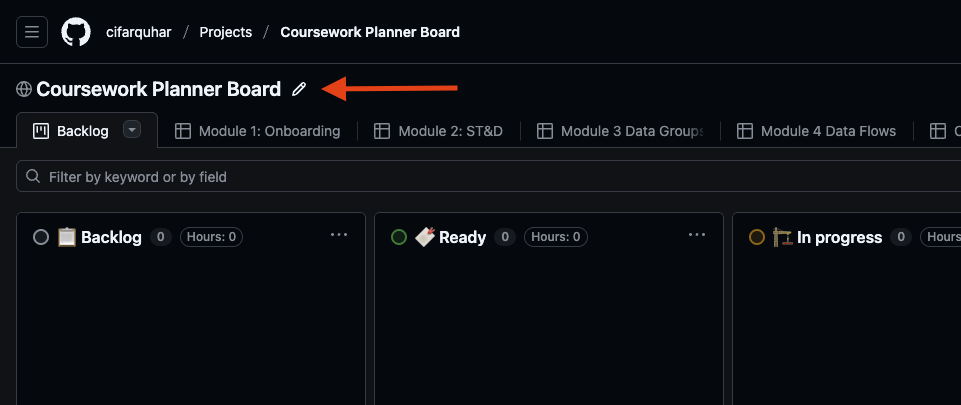
On the next screen you can rename your board to “Coursework Planner” and save your changes.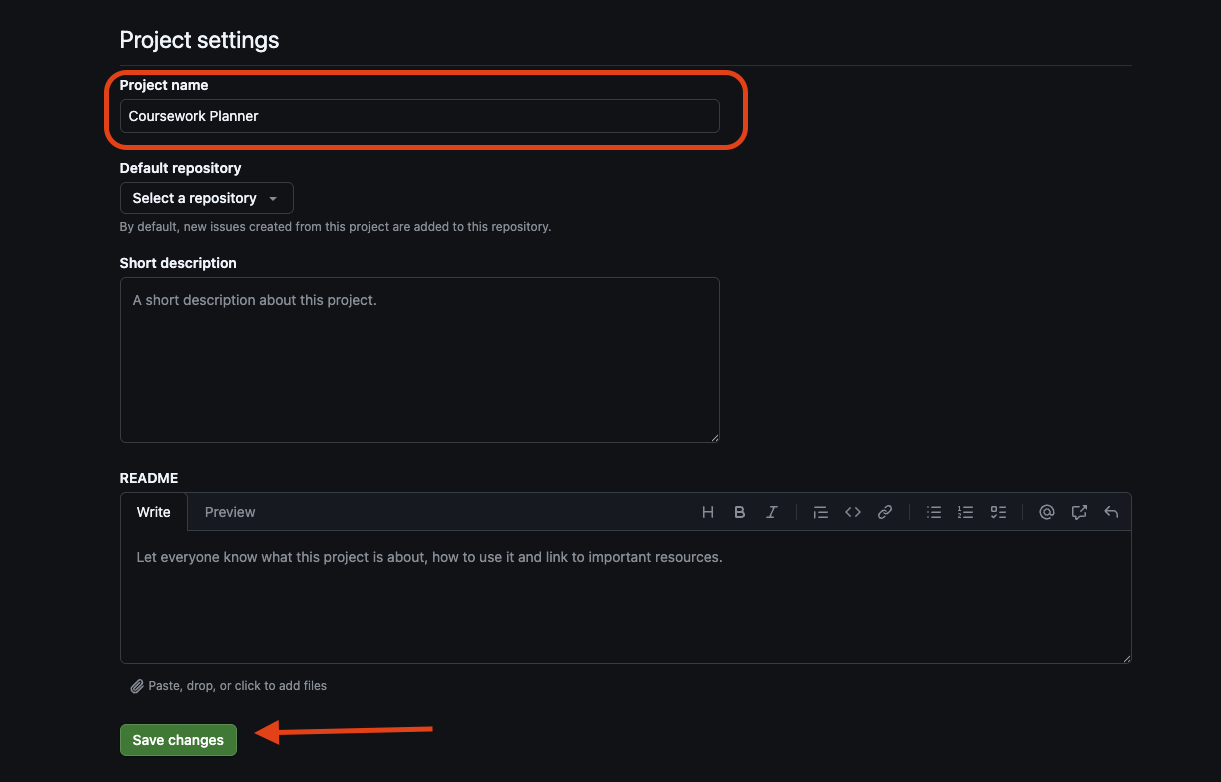
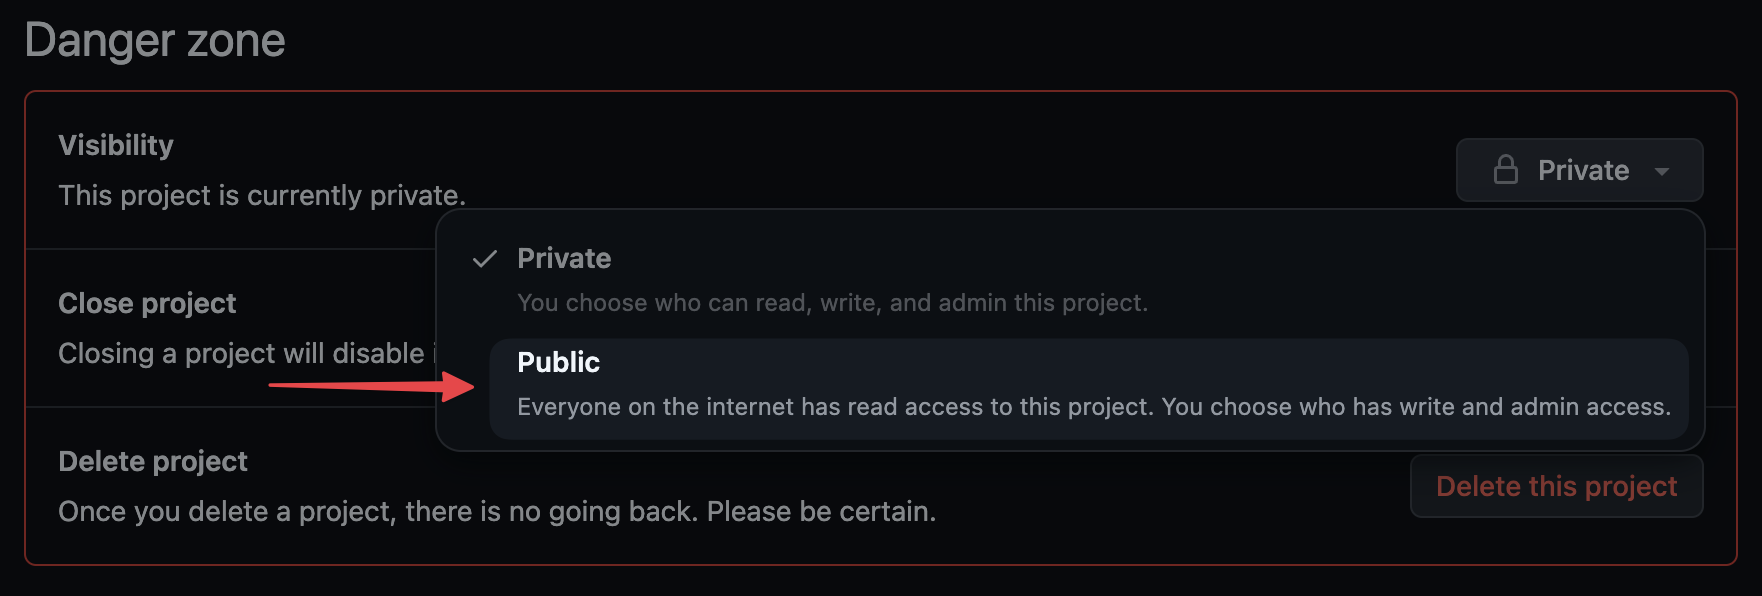
- Make your project board public so your mentors can see your progress - open the project board settings
- Scroll to the bottom to find the setting to make your board public
Linking the My-Coursework-Planner repo to your project board
- Go back to your forked version of the My-Coursework-Planner repo
- Under
Projects, clickLink a projectand select your project board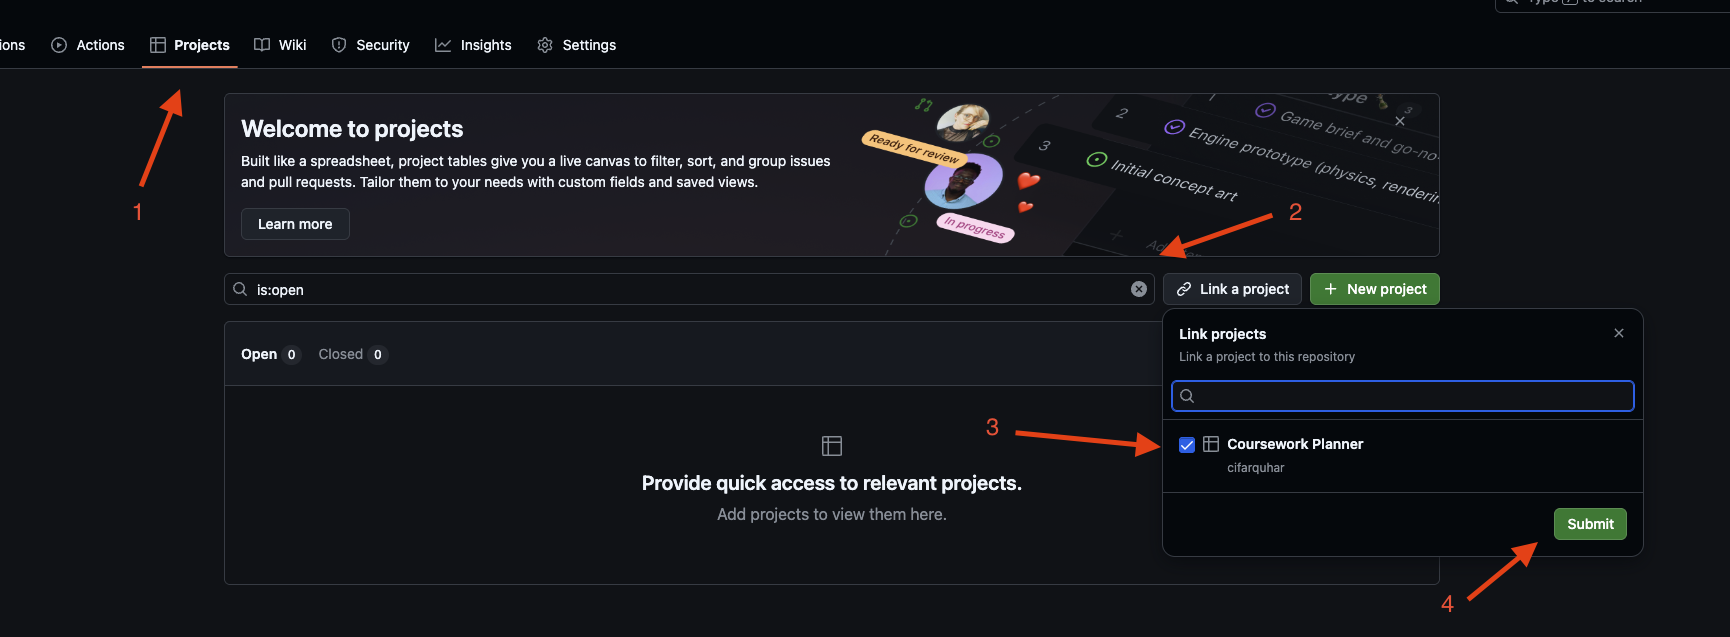
- That’s it! You’re ready to start adding issues to your board!
2. In every module, you will add your work as issues
Each sprint in each module has a Backlog page which lists the work you’re expected to do for that module. Every item in the list is actually a GitHub issue.
There is a “Clone” button next to each issue. When you’re starting a sprint, clone each of its issues into your coursework planner.
Copy issues for each week or at most for each module. The coursework content is updated frequently, you will not have the most up to date tasks on your board if you copy all modules at once.
If the Clone button isn’t working you can send a message in Slack asking for help, or speak to a volunteer in class on Saturday.
3. Manage and adapt your project board as you learn
There are example project boards attached to each module, showing you ways you can use boards to manage your time, prioritise, scope, and track your work. You should use the same project board all the way through the course, and add to it as you go. Learn as you go, and adapt your board as you learn.
You can, and should, also add your own tickets to the board. Just remember it’s a public board, so don’t add anything you don’t want to share with your mentors.
You can watch this video about how to create your coursework-planner board.
Youtube: Make your Planning Board
Get a copy of How Computers Really Work
Throughout this course, we will reference the book How Computers Really Work by Matthew Justice.
You will need a copy.
The author, Matthew Justice, has kindly donated a pdf of this book for use by CodeYourFuture trainees. If you would like a copy of this PDF, you can find access details in the #software-development-course slack channel.
If you buy your own copy from e.g. Amazon, CYF cannot pay for this.
Huge thanks to Matthew Justice and the folks at No Starch Press for their kind donation of this excellent book!